Internet Protocol address or IP address is a number that is used to identify a system on a network. It has two numbers; one is private to your local network and one identifies you on the wider internet. An IP address is typically generated automatically by the router and there’s no compulsion to keep it that way. You can always change it. Know more about IP Addresses here. Why? You’d ask. Well, this is done mainly to avoid online bans, bypass your country location restrictions and there can be some other reasons too. In this article, we are going to show you how to change IP address on Windows 10, macOS, and Linux. So, follow all the steps mentioned below.
Change IP Address
For Windows
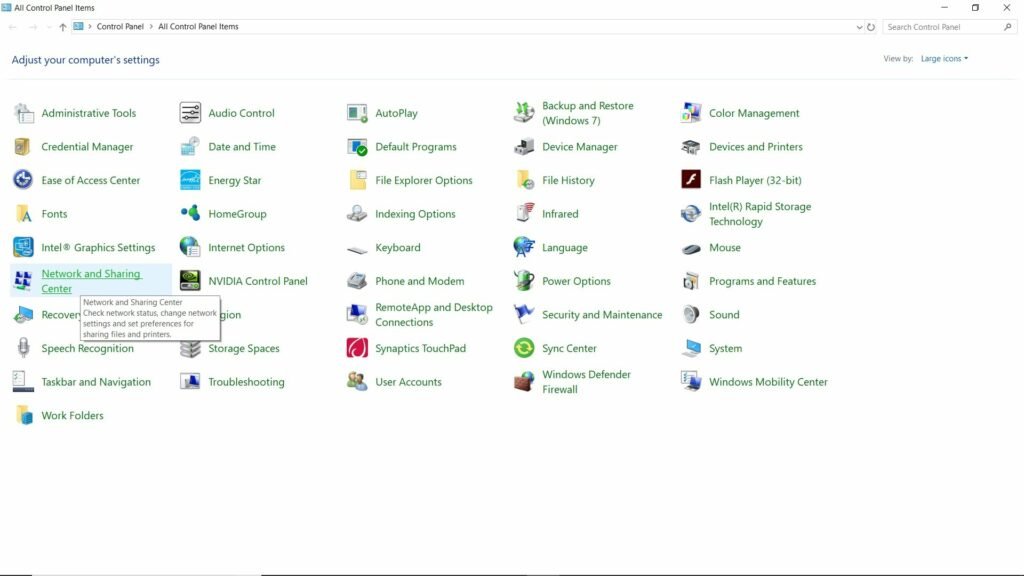
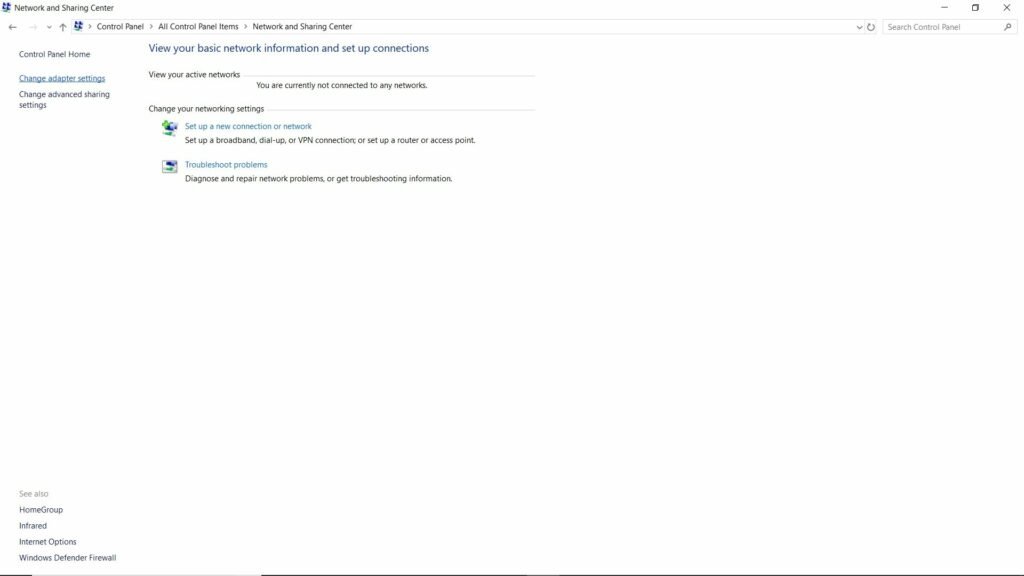
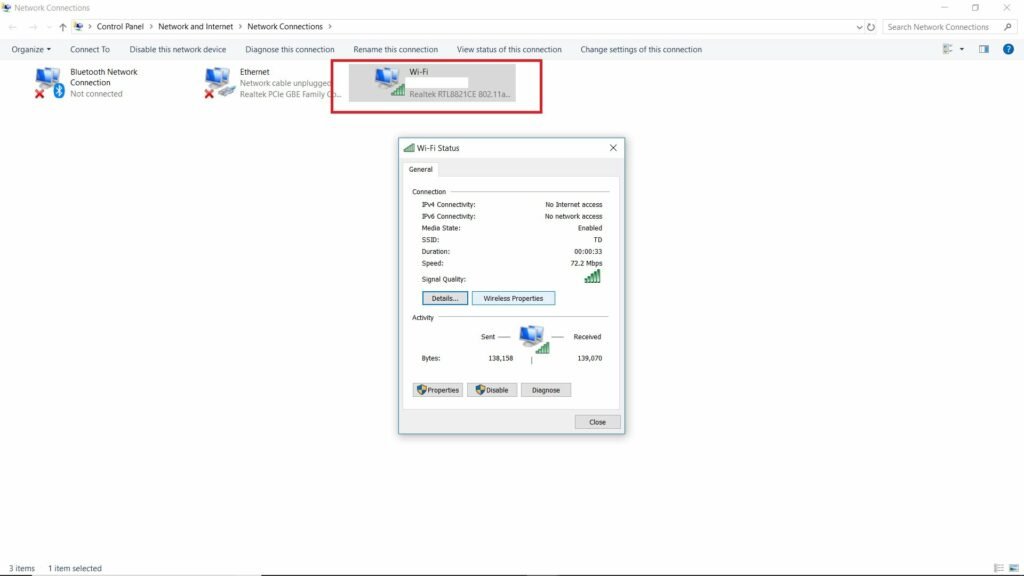
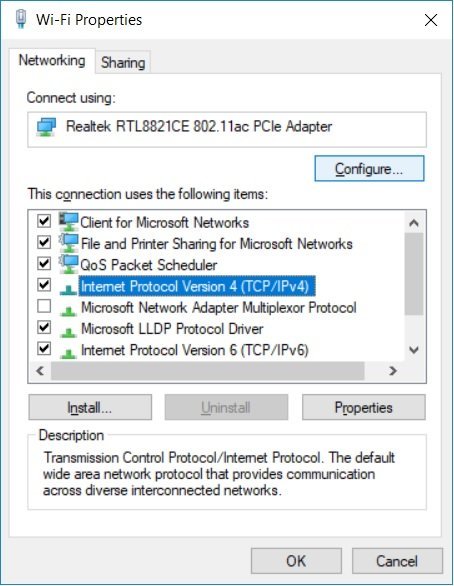
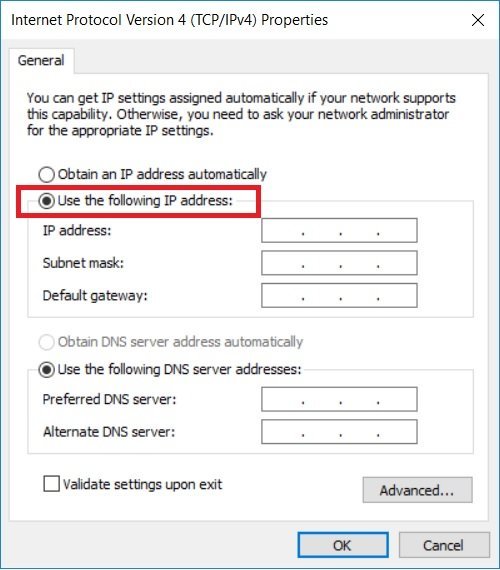
Step 1: Open Control Panel and click on ‘Network and Sharing Center’. Step 2: Click on ‘Change adapter settings’ from the left side menu. Step 3: Double-click on the active connection. Now click on ‘Properties’ Step 4: Double-click on ‘Internet Protocol Version 4(TCP/IPv4). Step 5: Now you can either select ‘Obtain an IP address automatically’ or you can select ‘Use the following IP address’. If you choose the automatic one, the router will assign an IP address automatically to your computer. However, when you enter IP address information, the computer’s IP address will remain static. Also, you can release and renew the DHCP IP address very easily, just type the following commands in the Command Prompt
For macOS
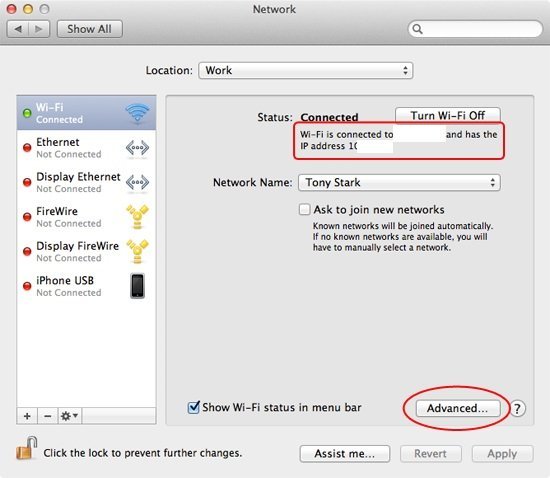
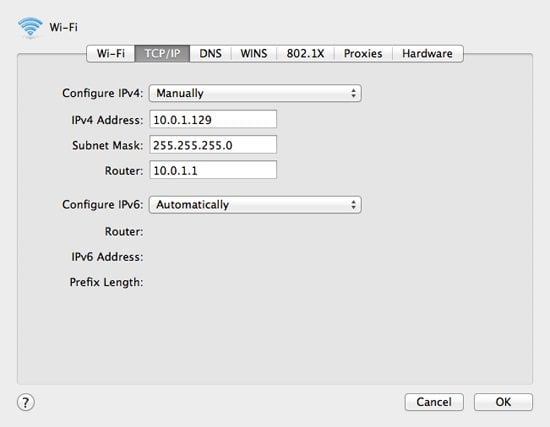
Step 1: From the Apple menu, go to System Preferences and select Network. Step 2: Select the active network from the side menu. Note down the current IP address as you will be required to create a new IP address within the private IP address range. Step 3: Click on ‘Advanced’ from the bottom-right side. Step 4: Navigate to TCP/IP tab and from the ‘Configure IPv4’ menu, select ‘Manually’. You can select any IP address and the good rule is that you change the last part of the number between the range of 0-255. As long as it is not assigned already to some other device, you will be able to use it. Step 5: Click on OK and Apply. That’s it and you are all set and you have assigned a static IP address for your Mac now. That was all about how to change IP address on Windows 10 and macOS. Do follow all the steps and let us know in the comments.